

Leather Sofa Sagging Repair: A Practical DIY Guide
Posted by Meliusly
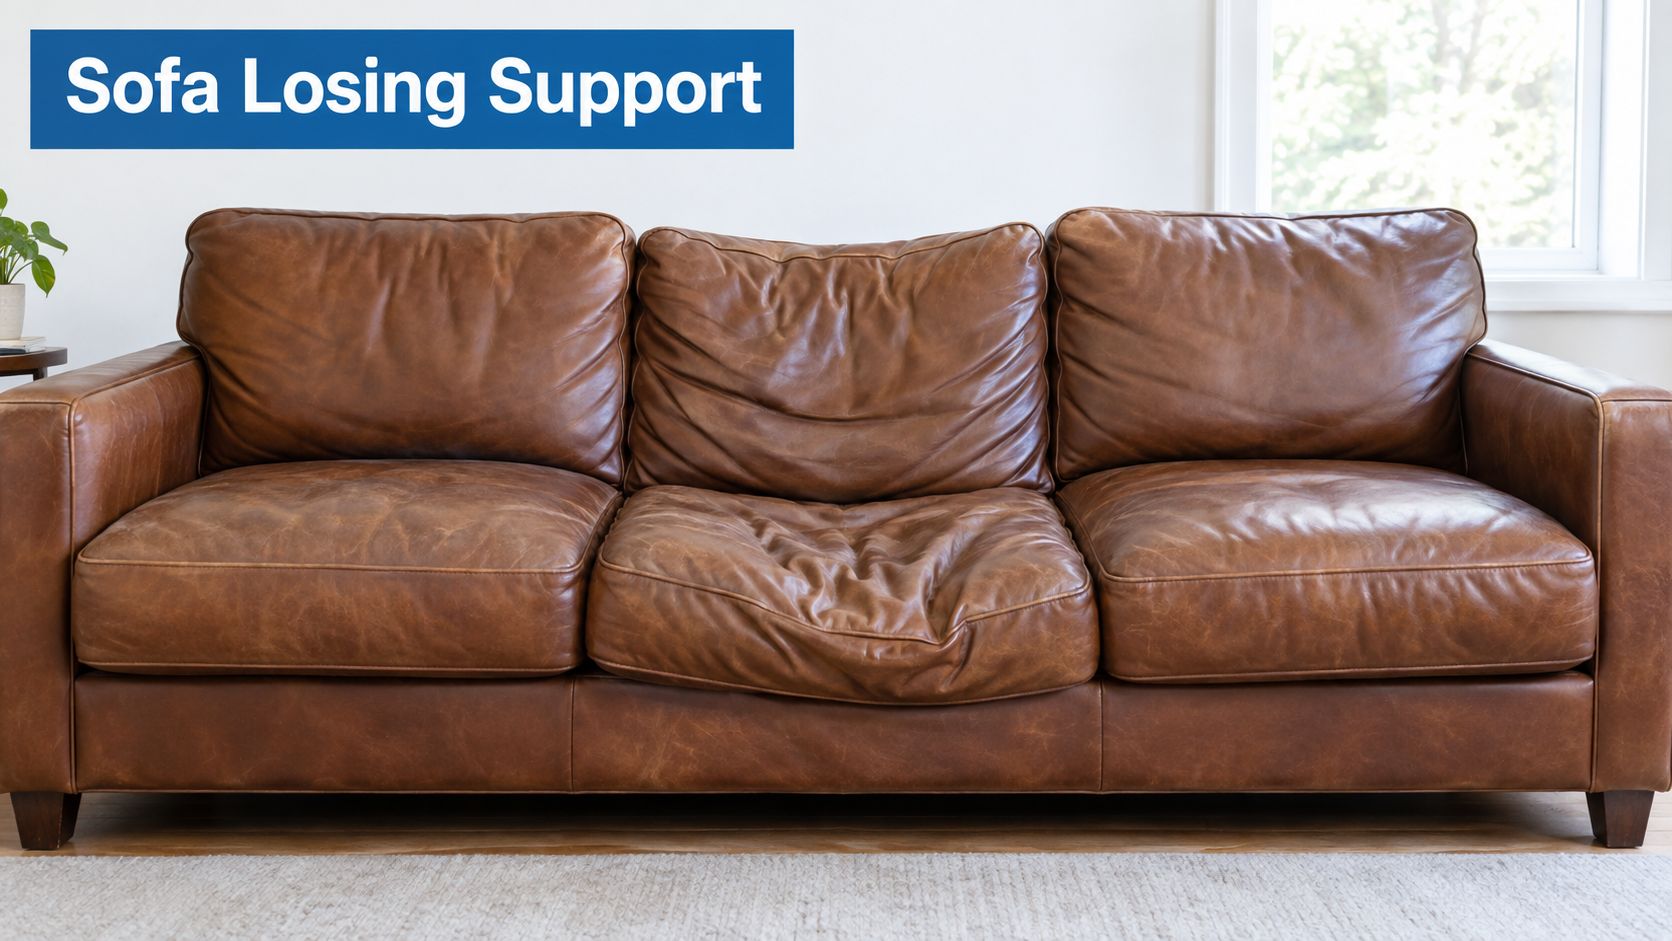
You sit down on your leather sofa and sink farther than you used to. The middle cushion has developed a permanent hollow, the leather gathers in tired-looking creases, and standing up feels harder because the seat no longer gives you a firm base. A quick search for leather sofa sagging repair usually brings up leather filler, conditioner, or patch kits. Those products can improve the surface, but they won't restore support if the failure is underneath.
Leather is the upholstery cover, not the load-bearing structure. The useful repair starts by tracing the path that carries your weight, from the frame and suspension to the foam and finally the leather. Once you identify that failed layer, you can choose between a reversible support board, a deeper DIY repair, cushion rebuilding, or professional upholstery work.
Why Your Leather Sofa Is Sagging in the First Place
A leather sofa is built as a stack of working layers. The hardwood or engineered frame provides the shape. Webbing, sinuous springs, or coil springs span the seat opening and distribute weight. Foam and fiber wrap sit above that suspension, followed by the leather cover that gives the sofa its finished appearance.
The cover can crack, stretch, fade, or develop loose folds, but those symptoms don't automatically mean the leather caused the sag. The internal support system usually determines whether the seat holds your weight or drops toward the frame. Suspension systems, rather than the leather surface, are commonly responsible for couch sagging.
How each layer loses support
Springs can lose tension, deform, detach from clips, or break. Coil springs also rely on ties to share the load, so a single failed connection can change how neighboring coils behave. Spring construction became common in upholstered seating by the late 19th century, improving comfort while adding mechanical parts that could fail over time, as this historical and practical repair guide explains.
Webbing stretches between its anchor points. When several straps loosen or tear, the seat develops a broad hammock-like dip rather than one sharp low spot. The frame may remain intact, but the suspension no longer spreads body weight evenly.
Foam gradually loses resilience under repeated compression. A cushion can look acceptable from above while feeling soft, thin, or permanently indented when you press it. Fiber fill may also migrate away from the center, creating a hollow that resembles structural sagging.
Frame joints can loosen under repeated loading. A cracked rail, shifting corner block, or weak attachment point won't be corrected by adding foam or covering the seat with a rigid board.
Practical rule: Repair the lowest failed layer first. Cosmetic leather work over a weak seat base is a finish job on a structural problem.
The distinction matters financially. Lower-quality couches may start sagging after 3 to 5 years under heavy daily use, while better-made sofas can retain their shape much longer, according to this sofa lifespan and repair-cost guide. A focused repair can make sense when the frame and leather remain sound. If the suspension, foam, frame, and cover are all declining together, replacement deserves serious consideration.
Diagnosing the Real Source of the Sag
Start with the cushions removed. Put each cushion on a firm, flat surface and press it with both hands. If one cushion stays visibly depressed, feels lumpy, or collapses without much resistance, the cushion core or fill may be the main problem. If the dip stays in the sofa deck after you move the cushions, investigate the base.
A firm palm-pressure test on the empty seat gives useful information. A seat that sinks more than about 1.5 inches under firm palm pressure is a warning sign that the springs may be failing, according to this leather sofa spring repair guide. The sensation matters as much as the depth.
Read the feel and sound
- Slow, mushy return: The foam is likely crushed or has lost resilience. Open the cushion cover if it has a zipper and inspect the compression pattern.
- Springy but bottomless feel: Stretched webbing, tired springs, or detached spring clips may be allowing too much travel.
- Hard stop with a creak or shift: A rail, corner joint, or frame connection may be taking the load directly.
- Metallic twang: A sinuous spring may be loose, stretched, or rubbing against its hardware.
- Dull thudding: Webbing or a support strap may be moving against the frame.
- Wooden crack or visible movement: Stop treating the problem as a cushion repair and inspect the frame.
Press the empty deck at the front edge, center, and corners. The resistance should feel reasonably consistent. Then lift one front corner slightly. If the sofa twists, one side rises unexpectedly, or the frame feels loose rather than solid, the issue may involve broken anchors or weakened joints.
Match the symptom to the repair
| What You Notice | Most Likely Cause | Next Step |
|---|---|---|
| The dip moves when cushions change places | Foam or loose fill failure | Rebuild or replace the affected cushion |
| The dip stays in the same seat position | Springs, webbing, or seat deck failure | Inspect the suspension beneath the cushions |
| The seat feels broad and hammock-like | Stretched webbing or multiple tired springs | Consider reinforcement or suspension replacement |
| You hear metal when sitting down | Spring or clip issue | Inspect hardware before using that seat heavily |
| The sofa twists or a rail shifts | Frame or joint damage | Get a professional assessment |
| The cushion is older than 7 to 10 years and has deep body impressions | Deformed internal cushion support | Rebuild or replace the cushion rather than patching the cover, as repair specialists explain in this leather furniture repair overview |
Don't buy foam, springs, or a board until you know whether the low spot follows the cushion or remains in the sofa. That one comparison prevents many wasted repairs.
Reinforcing the Seat With a Support Board
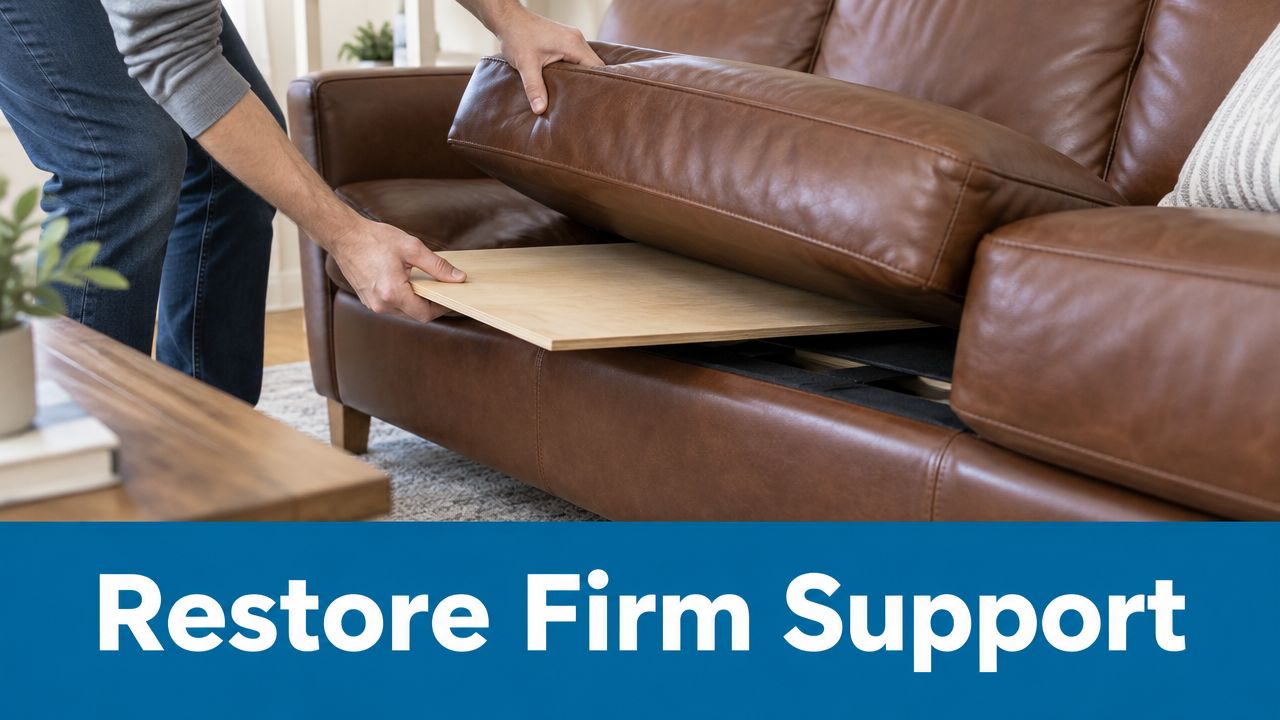
For mild to moderate base sag, a support board is often the most accessible DIY option. It creates a firmer platform beneath the cushions and redistributes weight across a wider area, without requiring you to remove the upholstery or rebuild the original suspension.
A properly fitted board can also restore some seat height and reduce the bottomless feeling. It won't make damaged springs or a cracked rail healthy, but it can be a sensible, reversible solution when the frame is still stable and the main complaint is lost firmness.
Fit the board to the seat deck
Remove all seat cushions and measure the usable deck width and depth. Check for a center support bar, raised frame edges, recliner hardware, or gaps that could prevent the board from lying flat. The board should bridge the weak section rather than sit on a single damaged point.
A 3/4-inch plywood panel is one possible material when you can cut it accurately and smooth the edges. A purpose-built sofa support board can be easier to position, particularly when you want a clean, removable installation. Meliusly offers a sofa support board guide that shows the basic placement approach.
Install it without damaging the sofa
- Remove the cushions and vacuum the deck so grit doesn't create pressure points.
- Place the board across the seating area, with its edges supported by the frame rather than suspended in open space.
- Sit carefully and check for rocking, sharp edges, or a ridge beneath the cushion.
- Add a thin protective layer if the board could rub against leather or a delicate cushion underside.
- If the sofa's construction allows it, use L-brackets to secure the panel to solid frame material. Don't fasten into weak wood or attach across moving recliner mechanisms.
Know what this fix can and can't do
A board works by spreading load. It can take pressure off isolated weak points in springs or webbing, but it won't replace a broken spring, repair a cracked frame, or restore foam that has collapsed. Very deep seats may feel firmer but still lack comfort unless you also rebuild the cushion with suitable foam.
Don't force a board into a sofa with exposed hardware, a visibly twisted rail, or a damaged folding mechanism. For a stationary sofa, check the panel periodically and reposition or inspect it as wear develops. The aim is controlled reinforcement, not concealment of a dangerous structural fault.
Replacing Webbing and Springs for Deeper Repairs
When the empty seat deck sags, and a support board isn't enough, the repair moves below the upholstery. Turn the sofa carefully onto a protected surface, remove the staples holding the cambric or dust cover, and peel back only enough material to see the suspension. Take photographs before removing anything, because the original spacing and attachment pattern are your working reference.
Wear gloves and safety glasses. Old staples, spring ends, and clips can release unexpectedly, especially when the suspension still holds tension.
Repairing webbing
Look for straps that are stretched, frayed, torn, or detached from the frame. A failing strap often creates a wide, soft depression. Remove the damaged section, measure its original path, and install matching replacement webbing with a webbing stretcher or controlled hand tension.
Staple the replacement securely into sound wood. If the frame edge is chewed up by old fasteners, new staples may not hold. Cross the straps in the original pattern so the seat resists both front-to-back and side-to-side movement. Uneven tension can leave the repaired seat twisted even when every strap appears attached.
Working with springs
Sinuous, or S-shaped, springs run between the front and rear rails. Inspect each spring for stretching, a broken section, a detached clip, or a sharp bend. A spring that has slipped free may only need a sound replacement clip, but a cracked or badly deformed spring generally needs replacement.
Traditional coil systems require more patience. Photograph the tie layout, check for leaning or collapsed coils, and retie sound springs with upholstery twine before replacing them. If more than half the springs in one seat are broken, or the frame rail has cracked, a professional upholsterer is typically the safer choice. Repairing coil-spring sections can cost about $300 to $800 per seat section, according to the spring repair reference.
Safety first: Heavy-gauge staples, pliers, good lighting, and patience matter more than speed. Never hold a tensioned spring in line with your face or hands.
The basic tool set includes a staple remover, upholstery stapler, needle-nose pliers, side cutters, measuring tape, marker, flashlight, upholstery twine, replacement clips, and appropriate webbing or springs. For a first-timer, allow 3 to 6 hours per seat for a deeper repair. This guide to repairing sagging couch springs provides further guidance on identifying the support system and handling the repair process.
Patching and Refreshing the Leather Surface
Once the seat support is stable, address what you can see. A sofa may have cracked panels, peeling finish, scuffs, faded areas, or leather that has pulled loose from its tucks. Those problems matter, but they belong after the load-bearing repair.
For a small surface crack, clean the area first and apply leather filler in thin layers. A color-matched compound can disguise shallow damage when you blend the edges carefully. Filler works best when the surrounding leather remains attached and flexible. It won't hold well over a panel that flexes because the seat base underneath is still moving.
Choose a patch or filler
A patch kit is usually more appropriate when the leather has a hole, a split, or missing material. Cut the patch to fit beneath the damaged opening, keep its edges smooth, and test the color on an inconspicuous area. A filler can level a shallow crack, while a patch supplies missing structure.
Flattened cushions need a different treatment. Loose fiber can be redistributed, but crushed foam needs replacement or rebuilding. A new foam insert wrapped in Dacron can restore shape, provided the cover still fits and the seat deck beneath it has already been corrected.
Restore the cover without hiding the problem
After the cushion is rebuilt, work the leather cover back into its original tucks and seams. Don't pull aggressively on an aged panel. Excess tension can open old seams or create a new split around the attachment points.
Leather maintenance also requires the right product category. Cleaners remove surface soil, conditioners help keep suitable leather supple, and protectants add another layer of care. A practical routine is to condition the leather every six months, while following the upholstery maker's care instructions and testing any product first. A leather care and conditioner option for homes can help you compare products, but no conditioner can rebuild failed foam, webbing, springs, or frame joints.
When to Call a Professional Upholsterer
DIY support makes sense when the frame is stable, the failure is accessible, and you can work safely. Call an upholsterer when the warning signs point to a structural rebuild: cracked frame joints, twisted rails, several broken spring coils, water-damaged MDF or particle board, or pest activity in the webbing or stuffing.
A professional quote should identify the failed layer rather than list “sofa repair.” Ask whether the price includes opening and closing the underside, replacing damaged fasteners, rebuilding foam, restoring the dust cover, and matching or repairing the leather. Published sofa repair estimates range from about $15 for a temporary support insert to more than $1,500 for extensive reupholstery and frame work. Full reupholstery is commonly estimated at roughly $1,000 to $2,900 in the United States, as outlined in this consumer repair and reupholstery pricing guide.
Compare the practical trade-offs
| Repair Type | DIY Cost & Time | Professional Cost & Time | Expected Lifespan |
|---|---|---|---|
| Support board | Material cost and a short installation, if the base is stable | Usually unnecessary unless fit or access is difficult | Depends on the condition of the original suspension |
| Webbing repair | Materials, careful access, and several hours of hands-on work | Quote should include retensioning, fastening, and closure | Can last well when attached to sound frame wood |
| Spring repair | Tools, replacement hardware, and substantial patience | Skilled diagnosis and controlled spring work | Depends on the number of failed components and frame condition |
| Foam rebuild | New insert, measurements, and cover handling | More predictable fit and finishing | Often worthwhile when the cover and frame remain sound |
| Full reupholstery or frame work | Not a realistic casual DIY project | Higher cost, but includes specialist labor and finishing | Depends on the quality of the rebuilt structure and materials |
The expected lifespan isn't a promise. A like-for-like repair may restore comfort while leaving an aging frame unchanged. Ask for reinforcement upgrades where appropriate, rather than automatically accepting replacement of the same weak component.
If you're also comparing seating construction for another room, this complete bench selection guide offers useful context on how frame, padding, and upholstery choices affect long-term comfort.
Before hiring, ask five direct questions:
- Portfolio: Can you show comparable leather sofa repairs?
- Written estimate: Which components will you inspect, repair, or replace?
- Materials: What webbing, springs, foam, and leather products will you source?
- Timeline: How long will the sofa be unavailable?
- Reinforcement: Can you strengthen the support rather than install an identical replacement?
Maintenance Habits That Prevent the Next Sag
A repaired sofa needs a routine that spreads wear and catches small changes early. Rotate removable cushions every two weeks, swap compatible cushions between seats, and avoid making one favorite spot carry every evening's use. If a cushion can't be flipped, rotate it where the construction permits and change seating positions.
Vacuum the crevices and under the cushions monthly. Dirt and debris can work into covers, seams, and cushion edges, while regular cleaning also gives you a chance to spot loose clips or a newly developing dip. Every quarter, press the seat with an open palm and compare the resistance with neighboring sections.
Use a simple care calendar
- Weekly: Change seating positions and reshape loose-fill cushions.
- Every two weeks: Rotate removable seat cushions.
- Monthly: Vacuum gaps, inspect the cushion edges, and check for new noises.
- Quarterly: Test the seat surface by hand and look for uneven height.
- Every six months: Apply a suitable leather conditioner after cleaning and testing it in an inconspicuous area.
- Annually: Tighten visible screws and inspect clips or sinuous spring attachments.
Keep the sofa away from direct sunlight and maintain stable indoor humidity between 40 and 55 percent. Leather can dry out in harsh conditions or absorb excess moisture, while environmental changes can also affect the materials supporting the cover. The Meliusly furniture care guide offers broader guidance for maintaining upholstered furniture and support components.
Recheck reinforcement before failure spreads
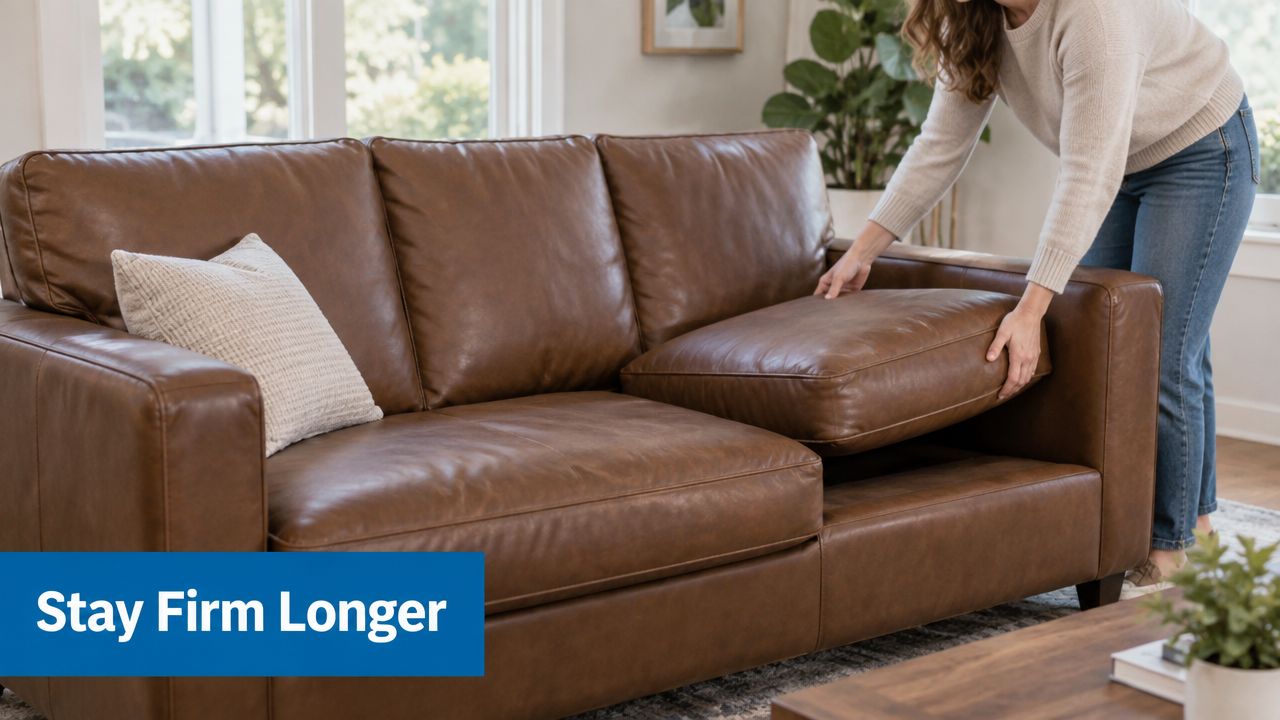
If you've installed a support board, reassess its fit every 18 to 24 months. Look for movement, new pressure marks, or a dip that has returned around the board's edges. A board can redistribute load, but it doesn't remove the need to monitor the suspension and frame beneath it.
Address small softness early. Rebuilding a cushion or securing a loose clip is simpler than repairing a collapsed seat with damaged leather and a weakened frame. That habit is what turns leather sofa sagging repair from a recurring emergency into ordinary furniture care.
Meliusly offers sofa support boards and related furniture support solutions that help homeowners firm up sagging seating without replacing the entire piece. Visit Meliusly to choose a practical support option for your leather sofa, sleeper sofa, chair, or bed foundation and extend the useful life of furniture you already own.
Share this post
- Tags: fix sagging couch, furniture restoration, leather couch support, leather sofa sagging repair, sofa cushion repair